1. Overview
Let’s continue with the series of posts dedicated to GitHub Actions with the second article where we will talk about how to build and publish a Docker image from your GitHub repository.
If you alredy know about Docker, containers, images and docker hub you can jump into paragraph 2.
Why is it important to automate the process of creating container images from our code repository? Because in this way, at each commit of our stable branch, we can execute a workflow that, for example: tests our code, creates an image and pushes it on a container registry. Next, we may have on the production environment, in cloud or on premises, a definition of our application stack (from docker-compose or yaml) that is run by an orchestrator such as Kubernetes or Docker Swarm. In this way, publishing a new version of our application, which could also be composed of more services, would simply mean downloading from the container registry the new versions of the container images defined in the application stack and updating the images of the running containers.
1.1 What about Docker, containers and images
I find the definition on wikipedia complete: Docker is a set of platform as a service (PaaS) products that use OS-level virtualization to deliver software in packages called containers. Containers are isolated from one another and bundle their own software, libraries and configuration files;
they can communicate with each other through well-defined channels. Because all of the containers share the services of a single operating system kernel, they use fewer resources than virtual machines.
As we can read from Docker official web site: A container is a standard unit of software that packages up code and all its dependencies so the application runs quickly and reliably from one computing environment to another.
Container images become containers at runtime and in the case of Docker containers, images become containers when they run on Docker Engine.
So why use containers and not old fashoned VMs? Again from docker web site: Containers are an abstraction at the app layer that packages code and dependencies together. Multiple containers can run on the same machine and share the OS kernel with other containers, each running as isolated processes in user space. Containers take up less space than VMs (container images are typically tens of MBs in size), can handle more applications and require fewer VMs and Operating systems.
1.2 How to build a Docker image
When building an image, we usually start with a basic one that will be used to create the environment in which the content of our image will run.
For example, if we want to create a container that would run our Angular or React application, we could start from a base image that uses a Linux distribution on which nginx is installed and then go to insert the static files content into the execution folder of the web server.
The definition of the operations to be performed in order to create the new image must be placed inside a file, usually called Dockerfile of which you can find the definition of the syntax on the official Docker documentation page.
The way to build a new image from an existing one is very particular and depends on the type of application you are creating. When it comes to using software that must be compiled before it can be run, there are usually two approaches: the first one is to compile the sources files before creating the image and then copy the results into the image.
The second approach consists in copying the sources inside the image, and compiling them into executables using the same environment that will subsequently execute them. I personally prefer this approach because it guarantees that the execution of the compiled files takes place within the same environment that compiled them from the sources.
Since the creation of the image is not a topic to be explored in this post, I will provide an example of creating an image starting from the sources of a web application in dotnet core. There are no limits to what can be built from the base images of the running operating system. A detailed list of examples of how to build images using different languages and frameworks is available at this address.
Suppose we have written an application in dotnet core and are in the folder containing the .csproj file and use “aspnetapp” as the project name, with this Dockerfile we can create an image that, starting from the sources, builds and publishes the binary files by placing them in the “out” folder and pointing the container execution entrypoint to the dll containing the result:
 1# syntax=docker/dockerfile:1
 2FROM mcr.microsoft.com/dotnet/sdk:5.0 AS build-env
 3WORKDIR /app
 4
 5# Copy csproj and restore as distinct layers
 6COPY *.csproj ./
 7RUN dotnet restore
 8
 9# Copy everything else and build
10COPY ./ ./
11RUN dotnet publish -c Release -o out
12
13# Build runtime image
14FROM mcr.microsoft.com/dotnet/aspnet:5.0
15WORKDIR /app
16COPY --from=build-env /app/out .
17ENTRYPOINT ["dotnet", "aspnetapp.dll"]
Dockerfile for build a dotnetcore app from source
The command to use to create the image, assuming you are in the folder containing the file called Dockerfile, is the following:
1$ docker build -t aspnetapp .
command for build the image
where “aspnetapp” is the tag that will uniquely identify the image and “.” is the parameter that indicates where to find the Dockerfile. For a complete guide see the official docker guide at this address.
Use the following command to check if the image was correctly created:
1$ docker images
2
3REPOSITORY                              TAG                 IMAGE ID            CREATED             SIZE
4aspnetapp                               latest              e6780479db63        4 days ago          190MB
5mcr.microsoft.com/dotnet/aspnet         5.0                 e6780479db63        4 days ago          190MB
list all images
1.3 How to run a docker image
Let’s try to run the following command in orter to start the container based on the image we built in the previous point:
1 $ docker run -d -p 8080:80 --name myapp aspnetapp
command to run the container
The parameter -d indicates that we want to execute the container in detached mode. The parameter -p means: publish the container port 80 to host port 8080. The parameter --name myapp indicates the name of the created container and the parameter aspnetapp is the tag of the source image used to run the container.
You can check the current running or created container with the following command:
1$ docker ps -a
2
3CONTAINER ID    IMAGE            COMMAND                   CREATED           STATUS     PORTS    NAMES
40f281cb3af99    aspnetapp        "dotnet NetCore.Dock…"    40 seconds ago    Created             myapp
command to show running containers
Find useful info at the official documentation.
1.4 What is Docker Hub
Docker Hub is the world’s largest repository of container images where users get access to free public repositories for storing and sharing Docker image.
Docker Hub provides repositories, where you can push and pull container images, automatic builds from GitHub and Bitbucket, trigger actions after a successful push to a repository to integrate Docker Hub with other services.
Docker Hub also provides a CLI tool (currently experimental) and an API that allows you to interact with Docker Hub.
From the docker hub web site you can browse all public available images that you can pull when executing docker containers.
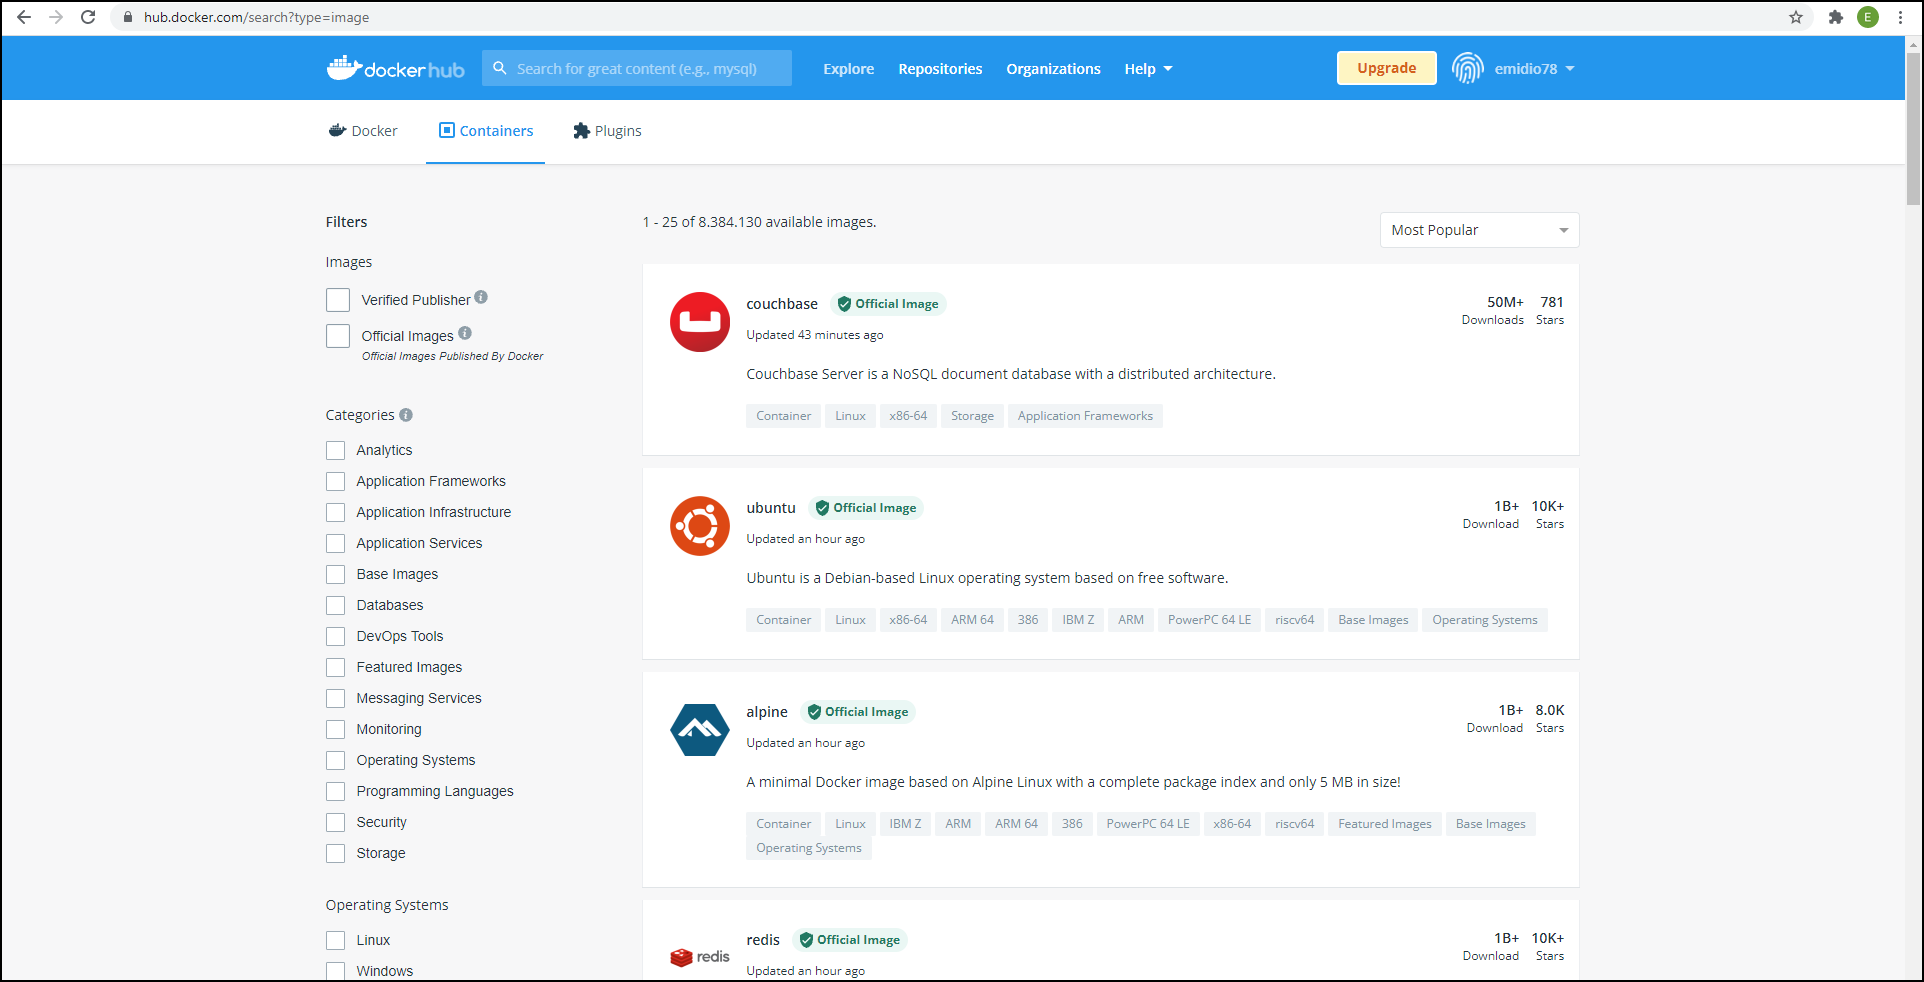
Public images from docker hub
Once you created an account you can have one private repository and as many public repositories as you want.
Find in-depth info at the following link.
1.5 How to push an image into docker hub
According to the official documentation, once you have an image with tag you can push it to a registry using the following syntax:
1 $ docker push [OPTIONS] NAME[:TAG]
docker push syntax
Where NAME is in the form of registry-address:port/account/repository. For example to push on docker hub the image “myimage” with tag “latest” for the account “myaccount” you can use the following command:
1 $ docker push myaccount/myimage:latest
In order to push an local image to remote registry, you have to create a tag from the local image.
A first option is to create the “myaccount/myimage:latest” while you build the image using the -t parameter:
1$ docker build -t myaccount/myimage .
Another option is to create a tag from an existing image:
1$ docker image tag myimage:latest registry-host:port-number/myaccount/myimage:latest
2. Github Actions and Docker: how to make GitHub Action build and publish our docker image
In the next paragraph we will create the Dockerfile that will produce our image. Following we will create the GitHub Action which will create the Docker image starting from the sources and send the image to the docker hub.
2.1 What we wanto to deploy
The image we are going to create will run an Angular app, published in the form of static html, js and css content, inside an nginx web server.
Referring to our GitHub repository the Angular sources will be located in the “src/web” directory.
The creation of the Angular build is done by calling the ng build command which will create the compiled files in the dist/web folder. This setting is described in the angular.json file under the outputPath entry.
2.2 Dockerfile describing the image
The Dockerfile is placed under the root of the project, src/web.
 1# Stage 1: Compile and Build angular codebase
 2
 3# Use official node image as the base image
 4FROM node:latest as build
 5
 6# Set the working directory
 7WORKDIR /usr/local/app
 8
 9# Add the source code to app
10COPY ./ /usr/local/app/
11
12# Install all the dependencies
13RUN npm install
14
15# Generate the build of the application
16RUN npm run build
17
18
19# Stage 2: Serve app with nginx server
20
21# Use official nginx image as the base image
22FROM nginx:latest
23
24# Copy the build output to replace the default nginx contents.
25COPY --from=build /usr/local/app/dist/web /usr/share/nginx/html
26
27# Expose port 80
28EXPOSE 80
Dockerfile
During the execution of the build of the image, first we create a build environment based on a nodejs image that we use to compile typescript sources to js:
1# Use official node image as the base image
2FROM node:latest as build
Then we set the working directory on the build image we just declared and copy all sources from the local folder:
1# Set the working directory
2WORKDIR /usr/local/app
3
4# Add the source code to app
5COPY ./ /usr/local/app/
Then we install all the npm client packages and run the command to start the Angular compilation:
1# Install all the dependencies
2RUN npm install
3
4# Generate the build of the application
5RUN npm run build
Now we can declare the base image for the execution environment which will be an nginx web server running on linux:
1# Stage 2: Serve app with nginx server
2
3# Use official nginx image as the base image
4FROM nginx:latest
The last thing to do is to copy the content of the output folder produced by Angular into the folder of nginx which will be served by the web server and expose the port 80 outside the container:
1# Copy the build output to replace the default nginx contents.
2COPY --from=build /usr/local/app/dist/web /usr/share/nginx/html
3
4# Expose port 80
5EXPOSE 80
If we stopped at this point we could use what we learned in the previous paragraphs to build a docker image starting from the definition of the dockerfile. This image would compile the Angular sources and insert them into the nginx web server. If we wanted, we could locally launch a container based on our new image and map a port of our choice to 80 of the container and visualize the result pointing at http://localhost:
Instead, what we want to achieve is, through the automation of a GitHub Action, the compilation and publish of the resulting image remotely, within GitHub, and then push the image obtained on the Docker Hub so that anyone can download and run our image publicly.
2.3 GitHub Action file
As we said in the previous post, it is possible to create a GitHub Action by choosing from those available in the marketplace or, as in our case, to build a new one using, in some steps, the actions taken from the marketplace.
Let’s start by creating a file called web-deploy.yml in the .github/workflows folder (we will create it if not existing).
The content of the file for the GitHub Action is as follows:
 1# This is a basic workflow to help you get started with Actions
 2
 3name: web-deploy CI
 4
 5# Controls when the workflow will run
 6on:
 7  # Triggers the workflow on push or pull request events but only for the main branch
 8  push:
 9    branches: [ main ]
10  pull_request:
11    branches: [ main ]
12
13  # Allows you to run this workflow manually from the Actions tab
14  workflow_dispatch:
15
16# A workflow run is made up of one or more jobs that can run sequentially or in parallel
17jobs:
18  # This workflow contains a single job called "build"
19  build:
20    # The type of runner that the job will run on
21    runs-on: ubuntu-latest
22
23    # Steps represent a sequence of tasks that will be executed as part of the job
24    steps:
25      # Checks-out your repository under $GITHUB_WORKSPACE, so your job can access it
26      - uses: actions/checkout@v2
27
28      - name: Login to Docker Hub
29        uses: docker/login-action@v1
30        with:
31          username: ${{ secrets.DOCKER_HUB_USERNAME }}
32          password: ${{ secrets.DOCKER_HUB_ACCESS_TOKEN }}
33
34      - name: Build and push
35        id: docker_build
36        uses: docker/build-push-action@v2
37        with:
38          context: ./src/web
39          file: ./src/web/Dockerfile
40          push: true
41          tags: ${{ secrets.DOCKER_HUB_USERNAME }}/timetrails-web:latest
content of the GitHub Action: web-deploy.yml
After specified the action name, we provide information about when the workflow will run. In our case after a push or pull request accepted on main branch:
1# Controls when the workflow will run
2on:
3  # Triggers the workflow on push or pull request events but only for the main branch
4  push:
5    branches: [ main ]
6  pull_request:
7    branches: [ main ]
Next thing to do is to define a job named “build” and specify that it will run on ubuntu:
1jobs:
2  # This workflow contains a single job called "build"
3  build:
4    # The type of runner that the job will run on
5    runs-on: ubuntu-latest
Then we need to declare some steps in order to accomplish the tasks. The first one is to checkout the source code from our GitHub repository into the GitHub Action environment. This is done using a marketplace action called “actions/checkout”:
1- uses: actions/checkout@v2
The second step is to login into the docker hub with an existing account. Here we use some secrets stored on GitHub Secrets (secrets.DOCKER_HUB_USERNAME and secrets.DOCKER_HUB_ACCESS_TOKEN).
This is done using a marketplace action called “docker/login-action” :
1      - name: Login to Docker Hub
2        uses: docker/login-action@v1
3        with:
4          username: ${{ secrets.DOCKER_HUB_USERNAME }}
5          password: ${{ secrets.DOCKER_HUB_ACCESS_TOKEN }}
The parameters needed to login into docker hub are provided by “username” and “password”
The last thing to do is build and publish the image into docker hub and it is done using a marketplace action called “docker/build-push-action”:
1      - name: Build and push
2        id: docker_build
3        uses: docker/build-push-action@v2
4        with:
5          context: ./src/web
6          file: ./src/web/Dockerfile
7          push: true
8          tags: ${{ secrets.DOCKER_HUB_USERNAME }}/timetrails-web:latest
It will need some parameters in order to identify:
- the starting folder which will be used as context (context)
- the path of the dockerfile (file)
- the confirm to push (push)
- the tag name of the pushed image (tags).
In the example we used the name of the project as the image name (timetrails-web) but you can use the appropriate value as the image tag name.
2.4 Testing push on commit
To verify that our pipeline works we can apply a change to the source code within our repository and push the changes.
Once the code has been pushed to the repository, the GitHub Action will start and we will be able to monitor the progress from the Actions panel.
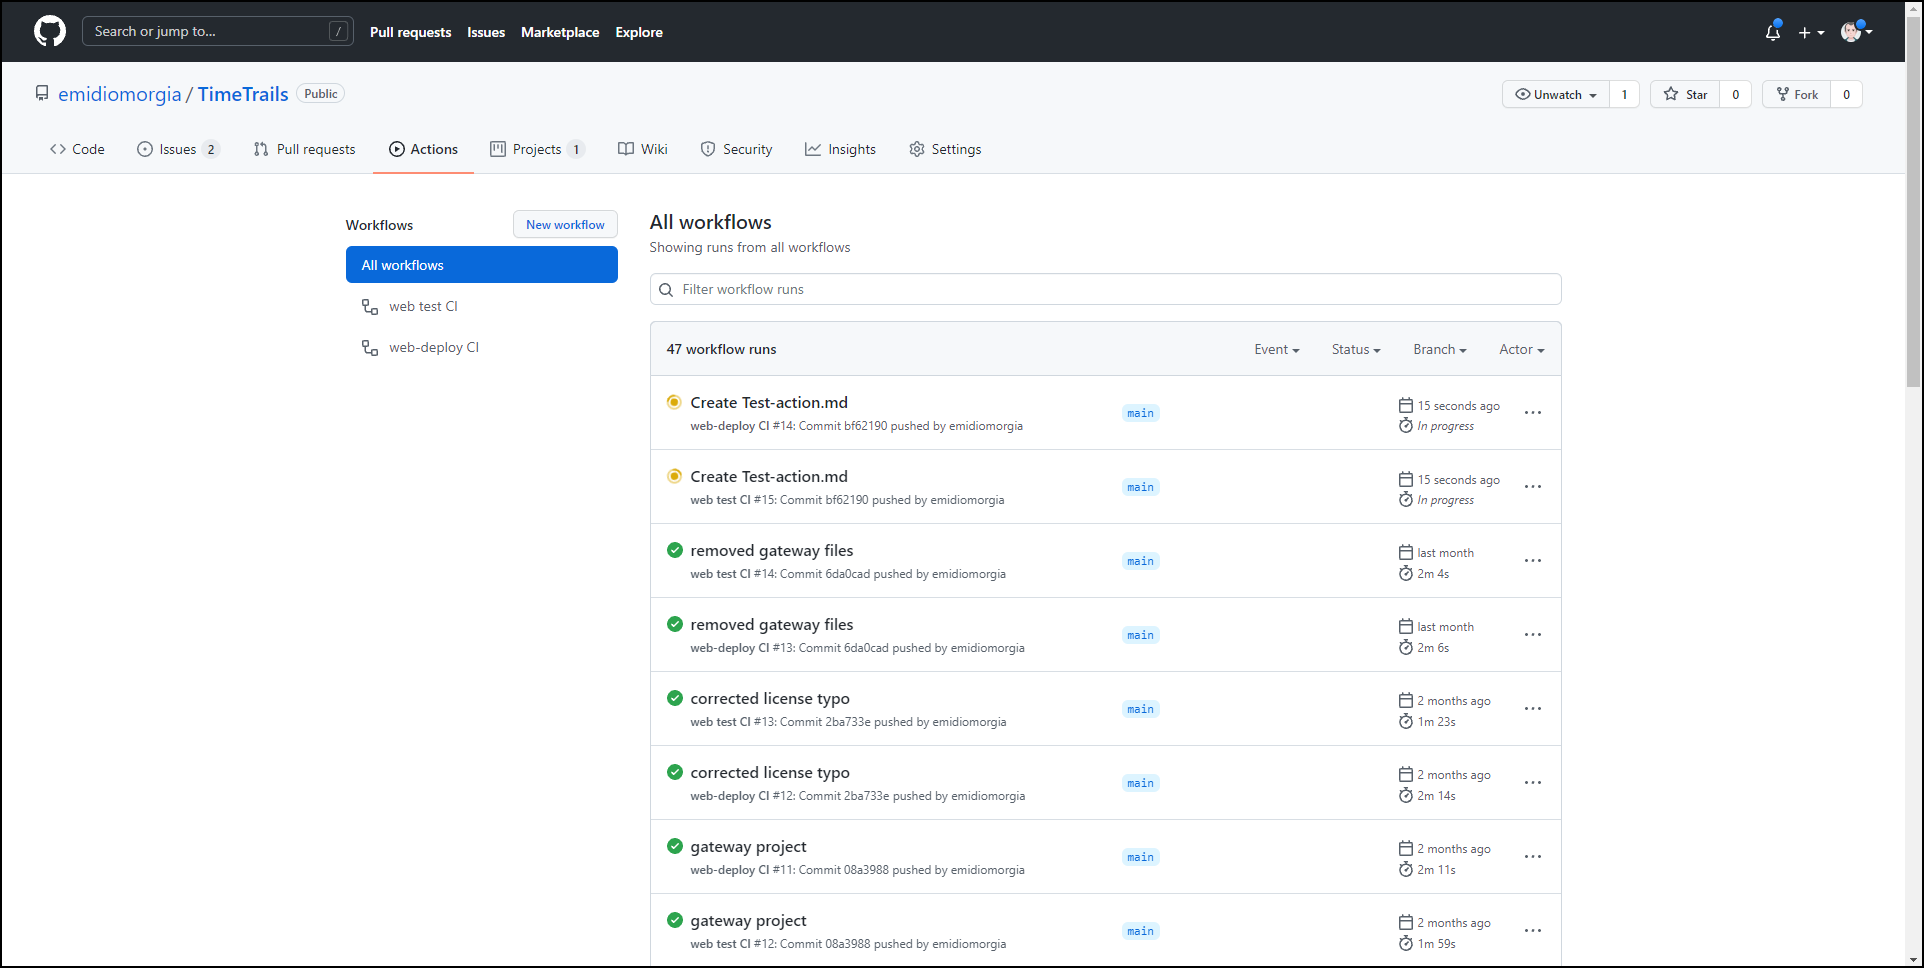
GitHub Action running after repository push
We can monitor the execution of our action by clicking on the relevant line in the action list by choosing the one that shows the title of the commit we used to activate the pipeline.
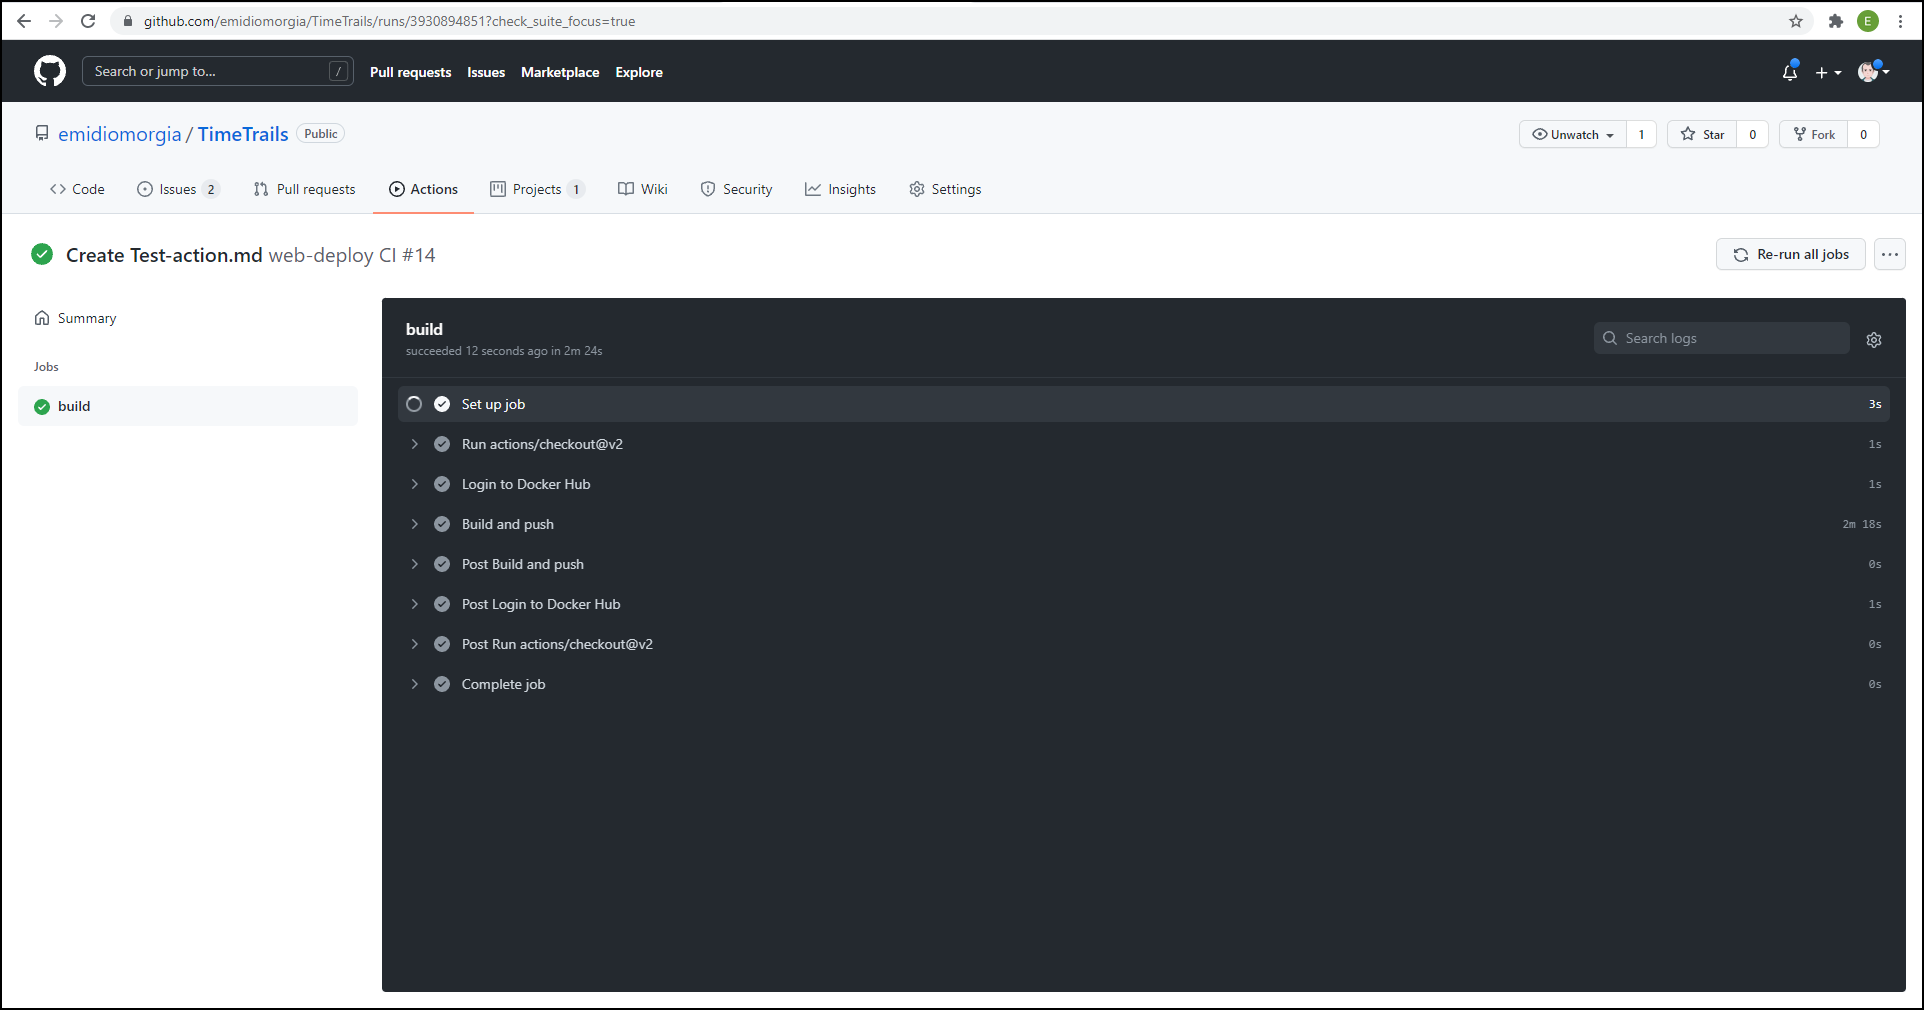
The summary of GitHub Ation executed
We can see the detail of each step declared in the file web-deploy.yml.
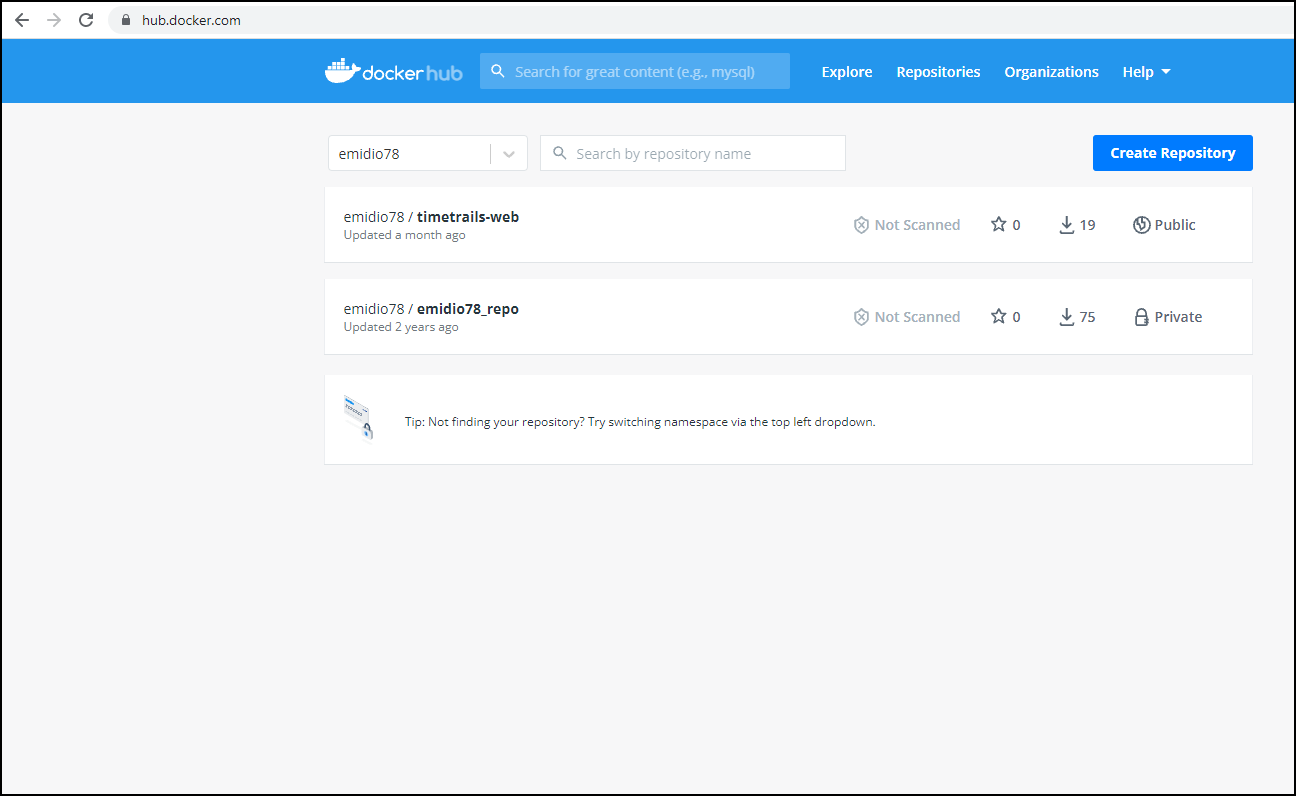
Finally, in the docker hub, we can check if the image was correctly pushed (in our case the image is timetrails-web):

2.5 Run the image from docker hub
Now that we have built the image and pushed it into the docker hub we can try to pull the image in docker and run the container at a specified free port with the following command:
1$ docker run --name timetrails-web -p 8080:80 emidio78/timetrails-web
You can check if the container is running with the following command and you should receive the following result telling yout that the image was pulled and the container is running at port 8080:
1$ docker ps
2
3CONTAINER ID   IMAGE                     COMMAND                  CREATED              STATUS              PORTS                                   NAMES
4e0107a4d4c93   emidio78/timetrails-web   "/docker-entrypoint.…"   About a minute ago   Up About a minute   0.0.0.0:8080->80/tcp, :::8080->80/tcp   timetrails-web
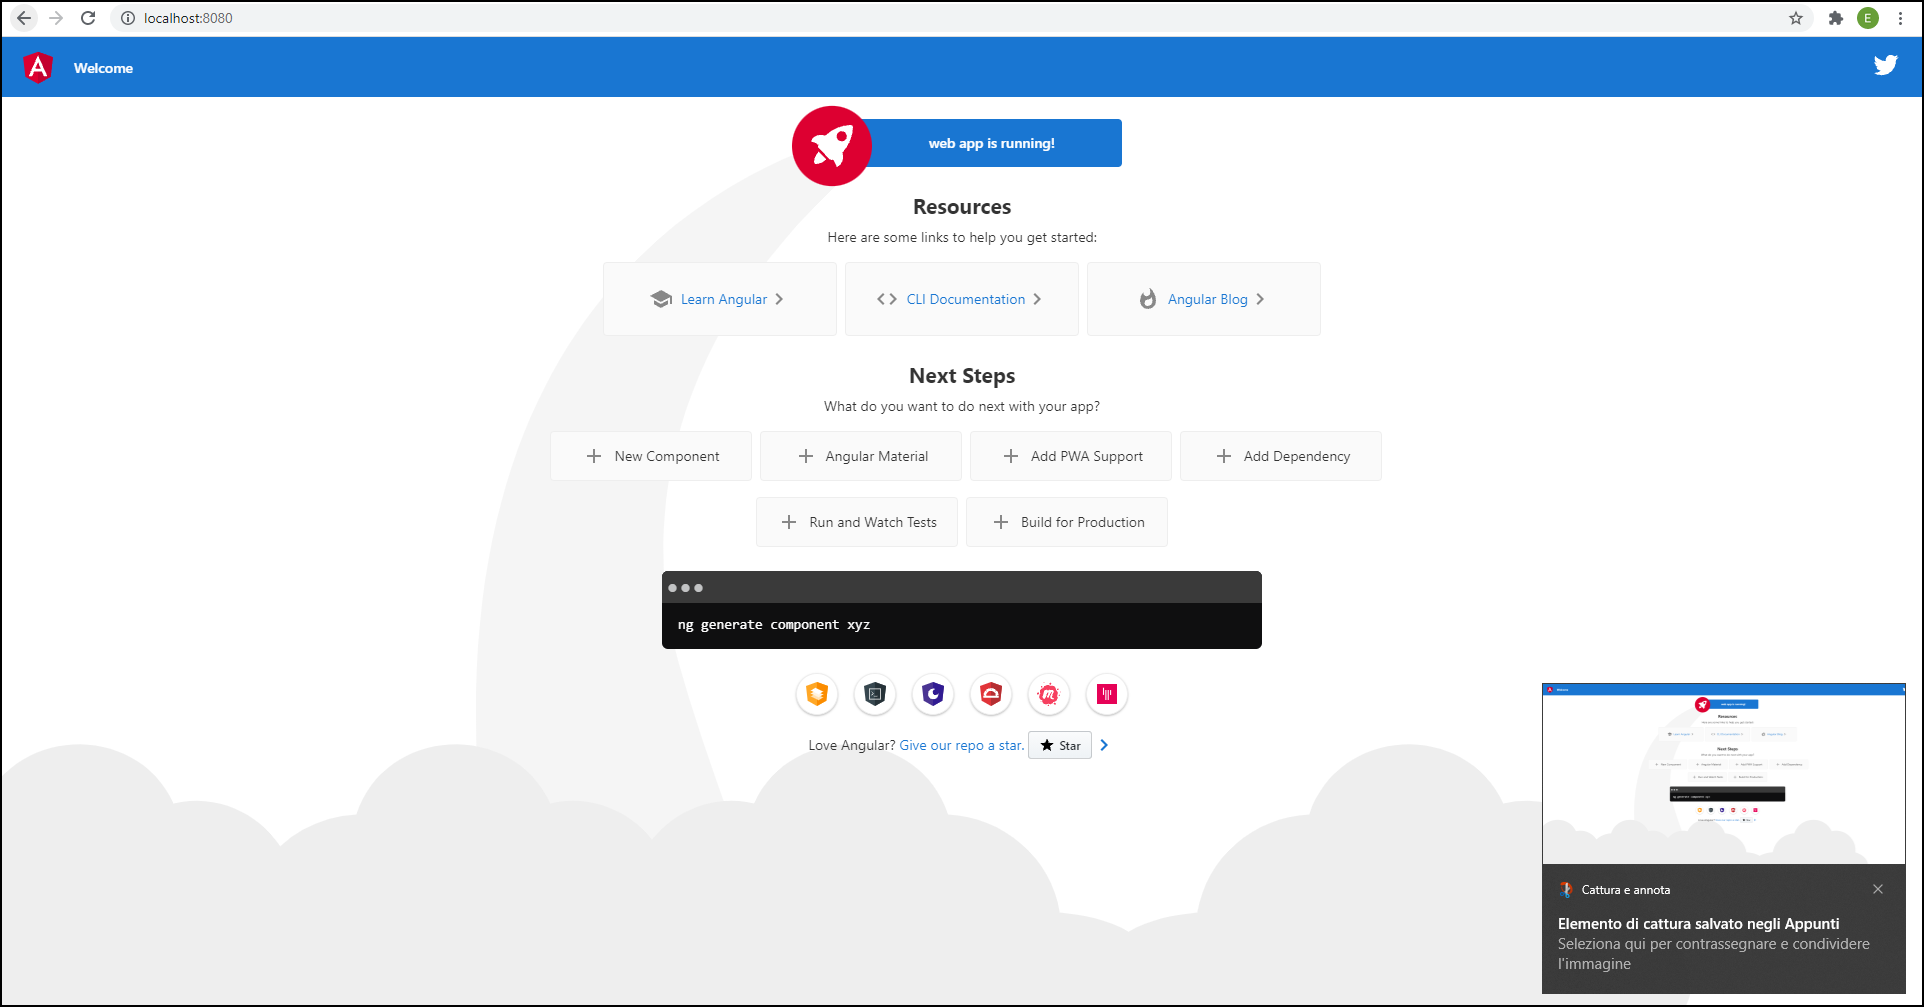
Opening the browser at http://localhost:8080 you should see the default Angular app generated by Angular cli:
Stay tuned for the third and final part of the series where we will talk about how to run the docker image inside a docker-compose stack from an Ubuntu server and how to expose our service through a reverse proxy such as NGINX.he project) and then publish the content on a Docker Hub repository.