1. Overview
Let’s start this series of posts “Series of posts”) dedicated to GitHub Actions with the first article about the definition of Action and how to create our workflow using the actions made available by the community.
1.1 About GitHub Actions
According to the GitHub documentation, a GitHub Action can: automate, customize, and run software development workflows right in your repository.
A typical use of GitHub Actions is to create a workflow to manage the Continuous Integration and Continuous Delivery or Deployment phase. In this article we will refer to the abbreviation CI/CD to indicate the combined practices of continuous integration (CI) and either continuous delivery or continuous deployment (CD).
1.2 About CI/CD
According to Wikipedia: CI/CD bridges the gaps between development and operation activities and teams by enforcing automation in building, testing and deployment of applications.
Therefore, through the CI/CD it is possible to manage, for example, all the activities necessary to publish or deliver the output deriving from the compilation of the sources. It is also possible to condition the execution of the publication on the results of the tests or on the level of coverage of the tests or on the quality of the code.
Again according to Wikipedia: Continuous Integration (CI) is the practice of merging all developers’ working copies to a shared mainline several times a day.
For example, with continuos integration, we could monitor a branch on which to merge pull requests and verify in real time that it is ready to be promoted to a release branch by verifying the outcome of the automatic tests or measuring some parameters relating to the quality of the code.
Or we could set up a workflow to discard pull requests for which automatic tests and quality parameters do not meet the acceptance levels we set.
According to Wikipedia: Continuous Delivery (CD) is an approach in which teams produce software in short cycles, ensuring that the software can be reliably released at any time and, when releasing the software, without doing so manually
For example we could automate the creation of docker images to be published on docker hub or the creation of npm, nuget or maven packages or the creation of binary distributions of our sources compiled for different architectures.
As this topic is beyond the scope of this article to learn more you can follow the links below to get detailed information on CI and CD.
2. Setup a simple GitHub Action
Let’s start to see where it is possible to view the actions connected to our GitHub project and how to create the first action that performs a greeting.
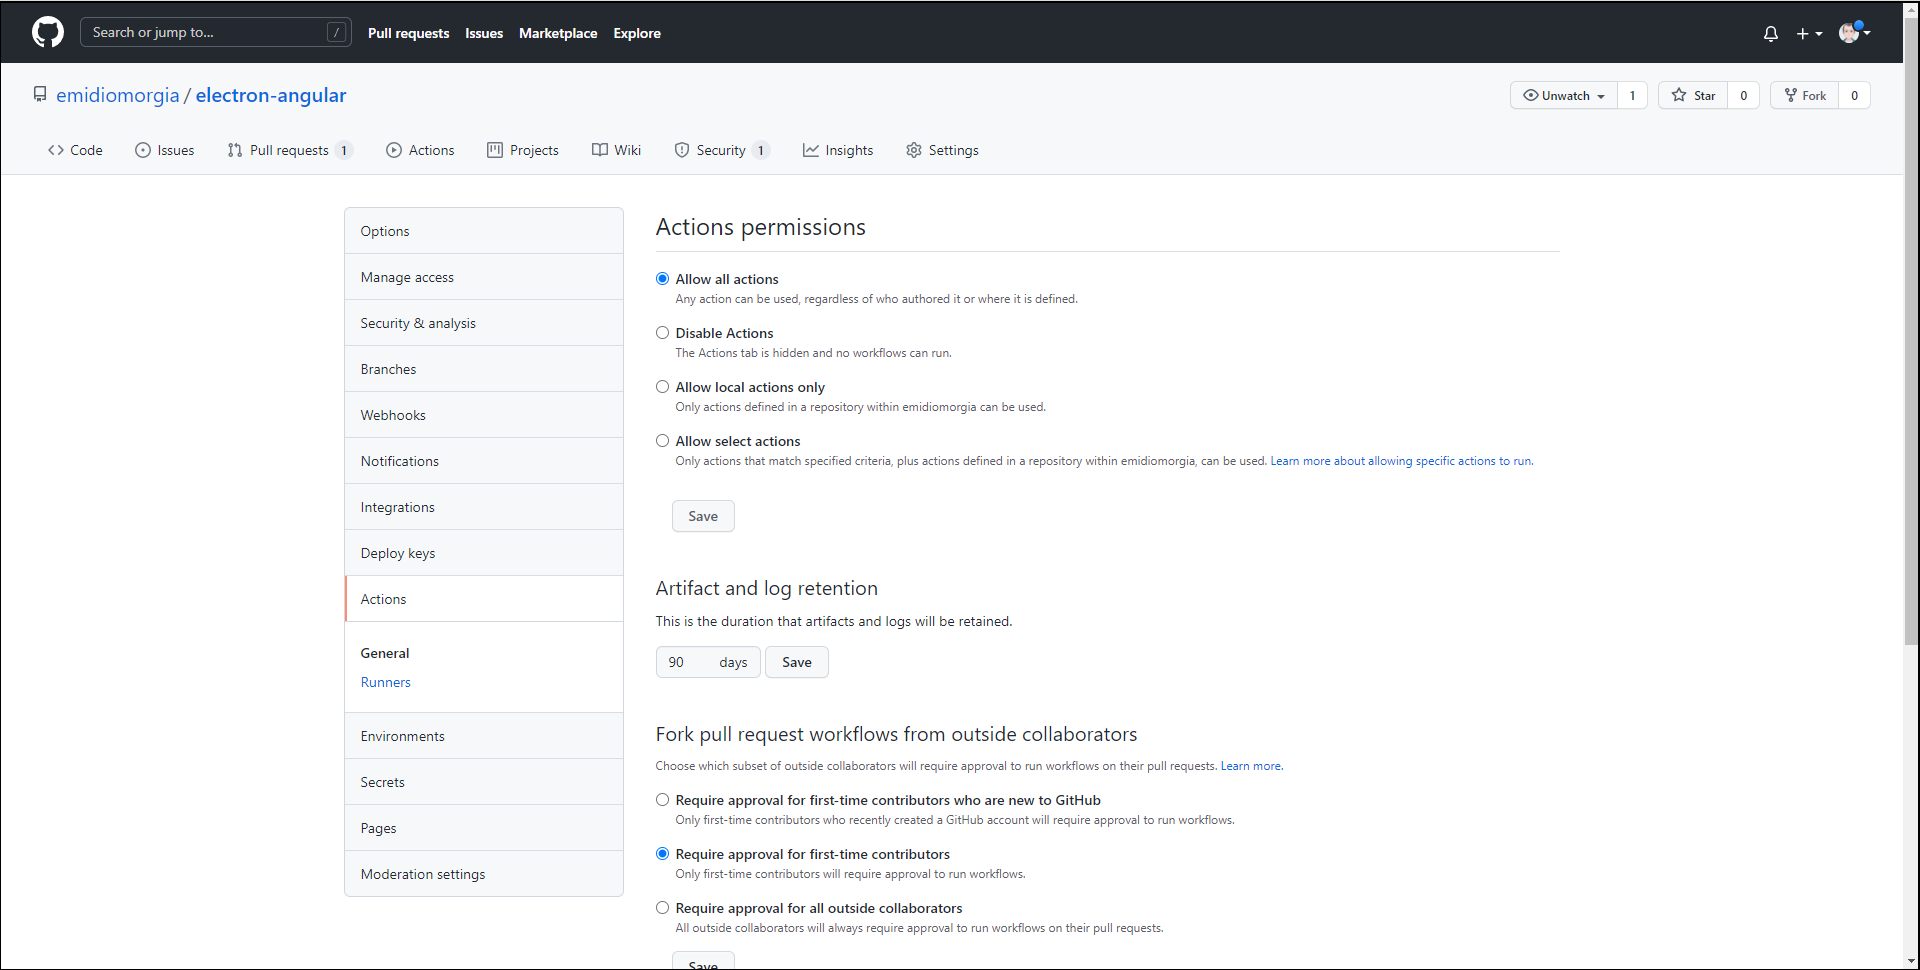
2.1 Enable Actions on repository
Assuming you have an existing GitHub project, make sure you have enabled Actions by going to the Settings menu and clicking on the Actions item. We need to make sure that “Allow all actions” is checked.
Enable Actions
2.2 Choose an existing Action template from marketplace
Then we can use the “Actions” link on the toolbar to view the list of actions already set. In case there are not already saved actions, GitHub offers us a selection of actions compatible with the content of our repository.
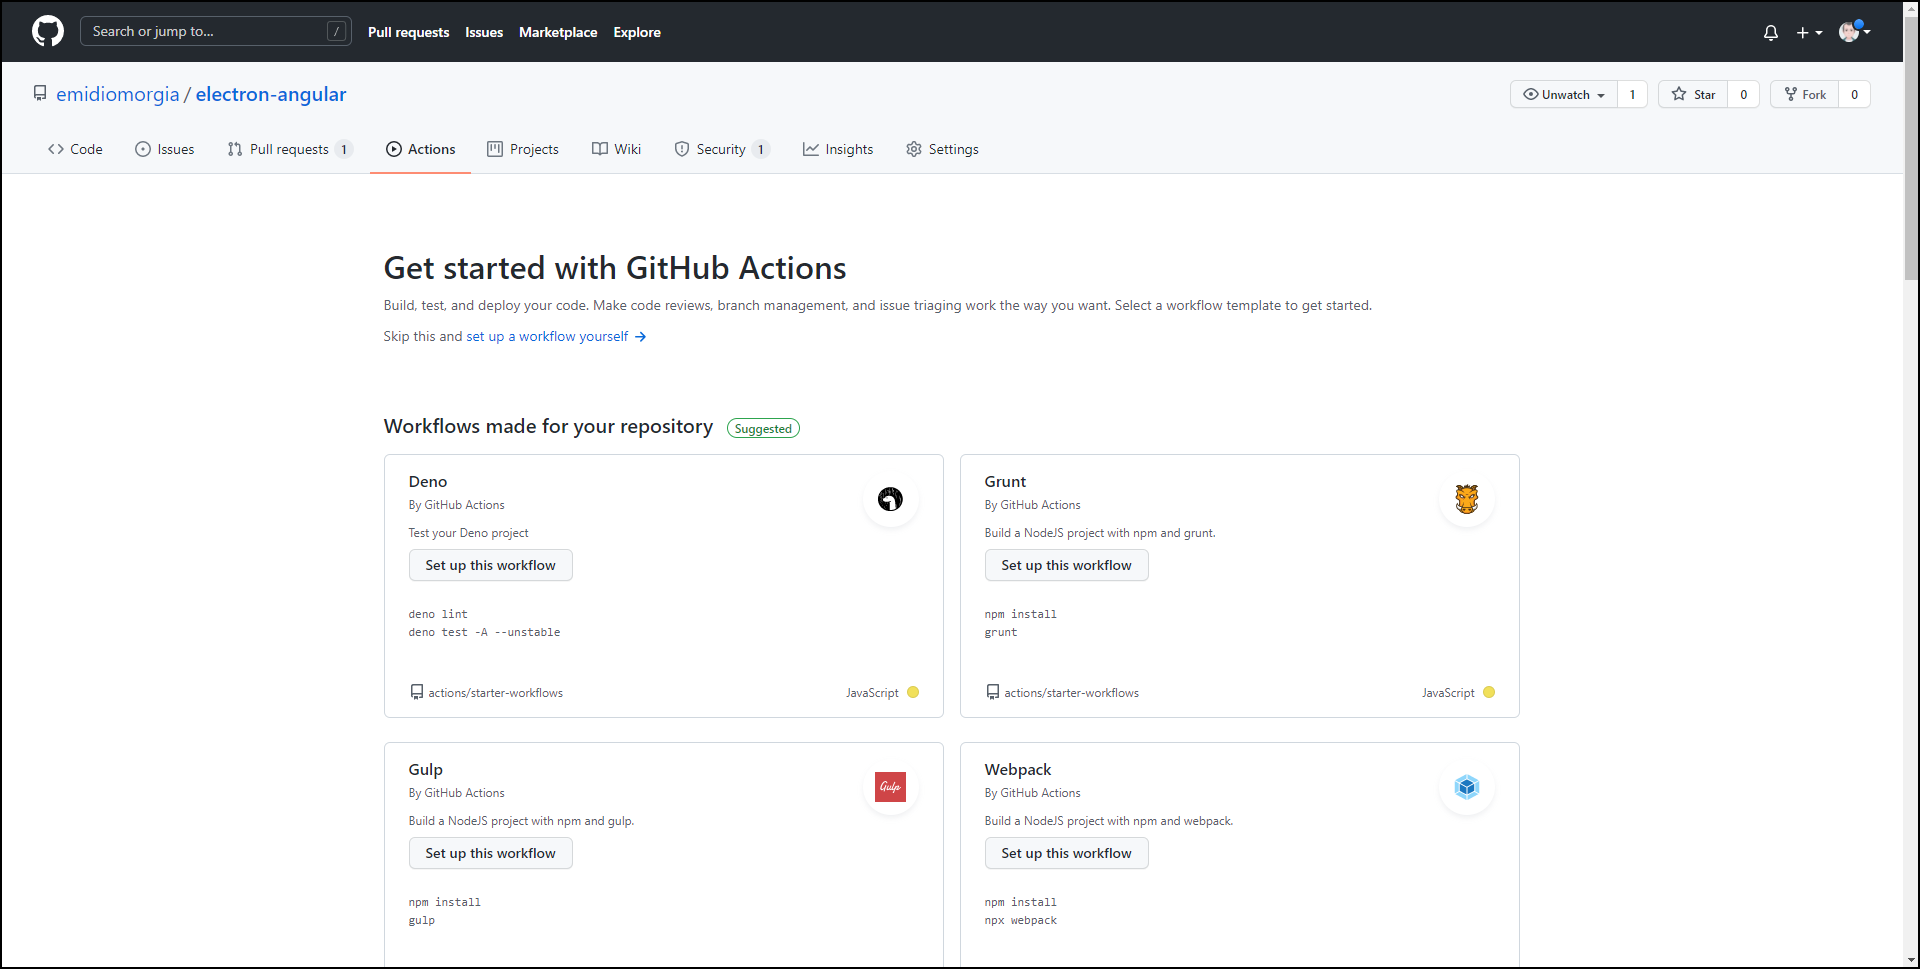
List of marketplace Actions to use
For example we can use the Action “Greetings” that we find at the bottom of the list among the examples provided by GitHub.
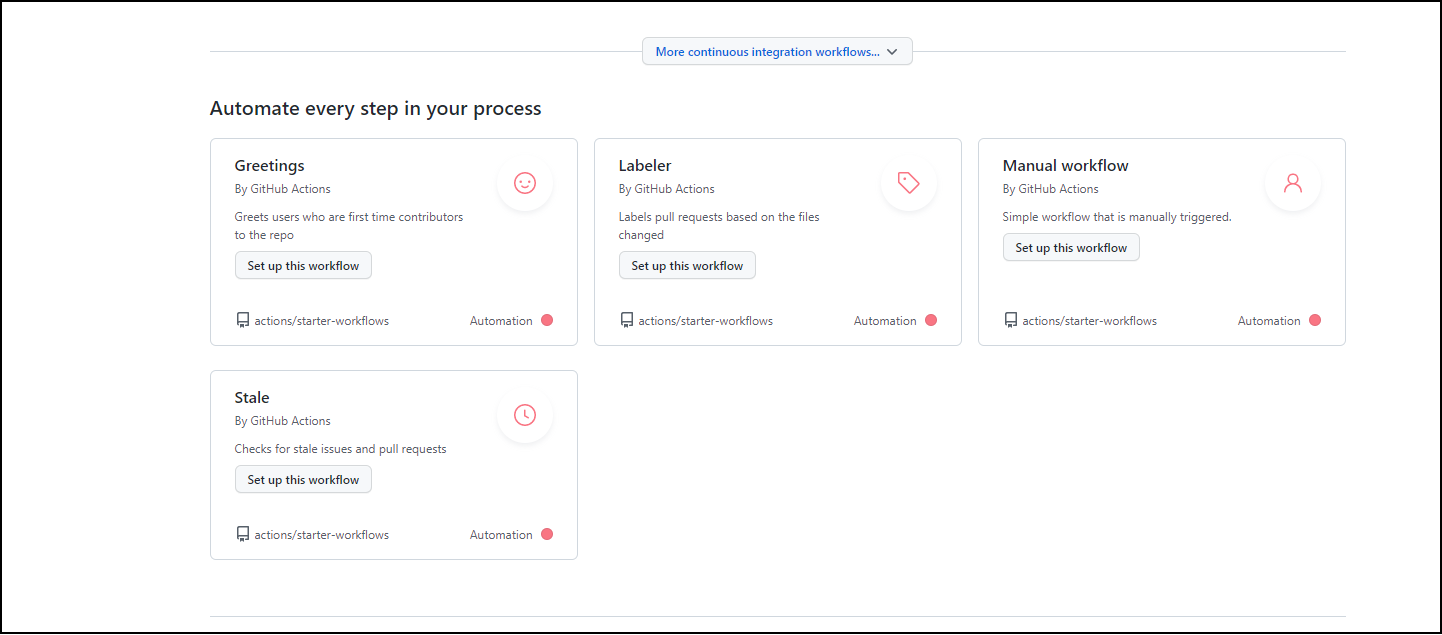
Choose Greeting Action example by Github
GitHub will create a greetings.yml file in the folder: “.github/workflows”.
2.3 Customize the Action using the editor
Before saving the Action source code we can edit steps as we like.
Basically we’ll have the following:
line 1: name of the action
line 3: the events for which the action will be activated
line 5: a list of jobs (in our case only one)
line 6: a job called “greeting”
line 7: the parameter that establishes the execution environment as linux ubuntu
line 8-10: permissions for executing the action
line 11: a series of steps
line 12: the action id on which this step is based
line 13: a list of parameters for the step
line 14: the repository token (taken from repository secrets)
line 15-16: the messages this action will use to greet the user
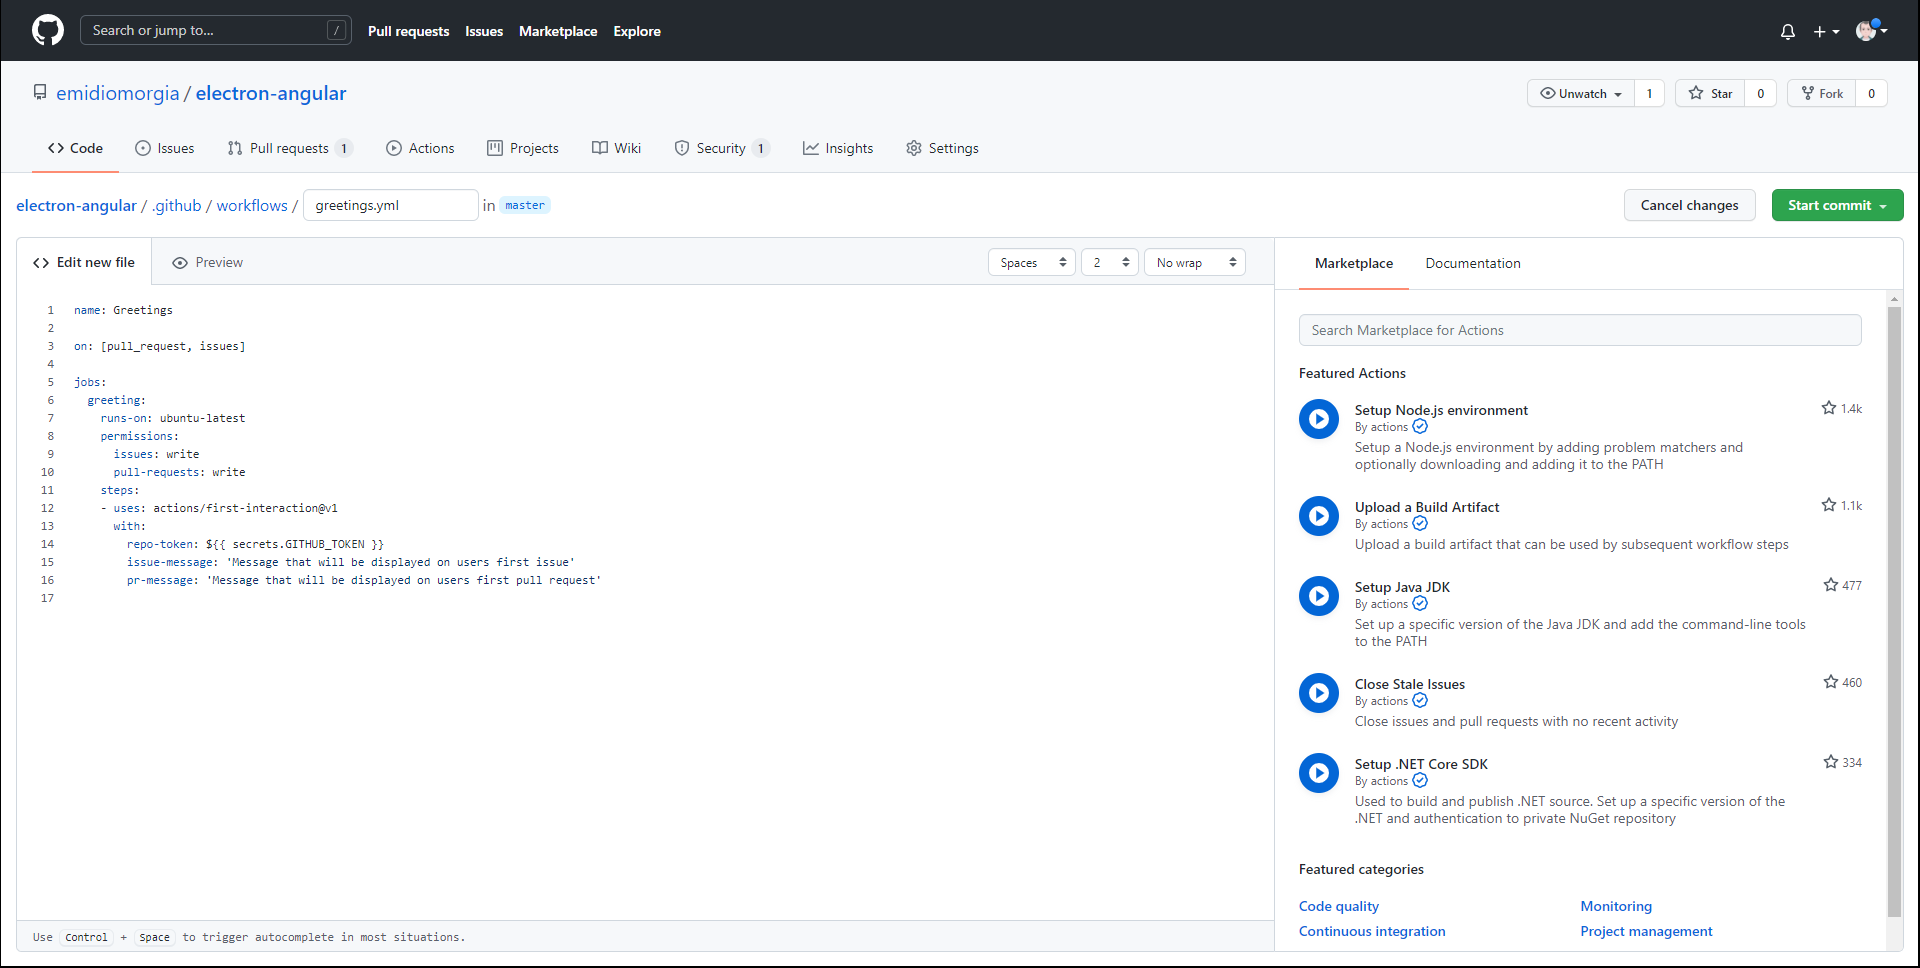
greeting.yml file created by GitHub
For a guide to the syntax and commands of the actions I refer you to this link.
2.4 Test the action
If you try to go to the “Action” menu you should see an empty list of executed Actions because no user has yet created an issue. When a user creates a new issue for the first time, our action will be invoked and the user will receive the message within the issue thread and will also receive the message by email.
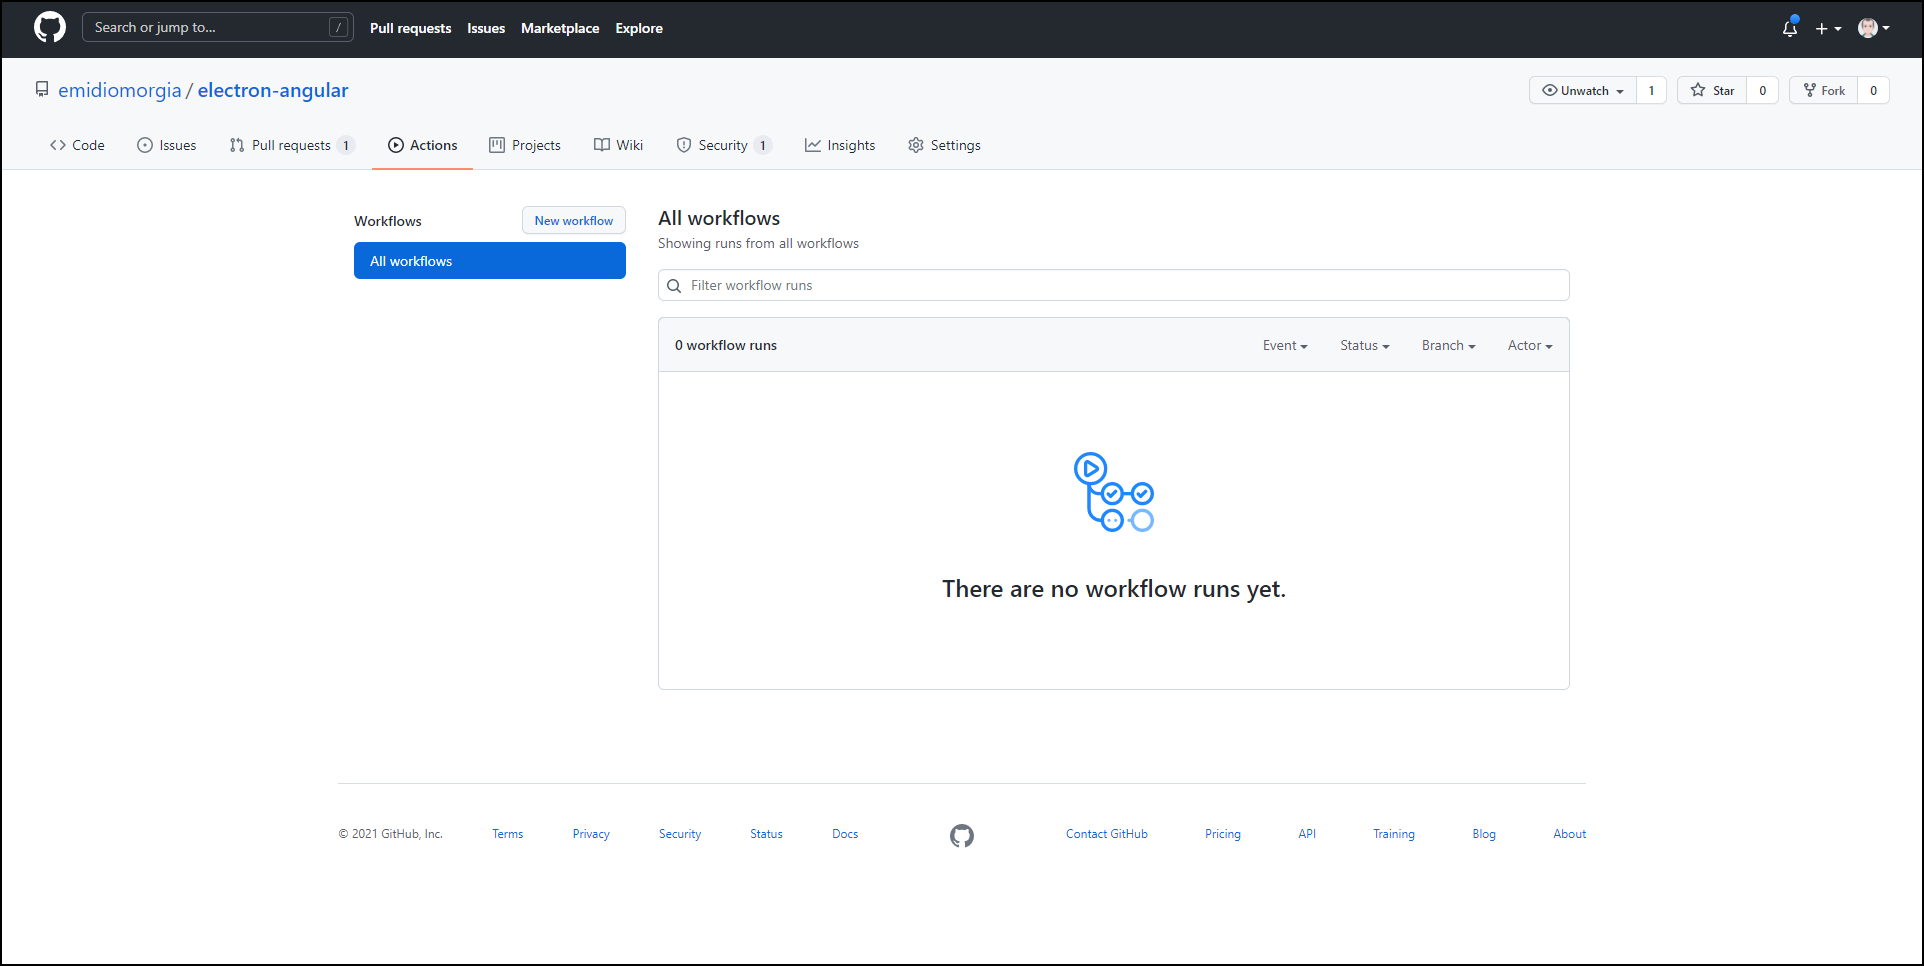
Action list is empty
We will now create a first issue and verify that the Action runs as expected.
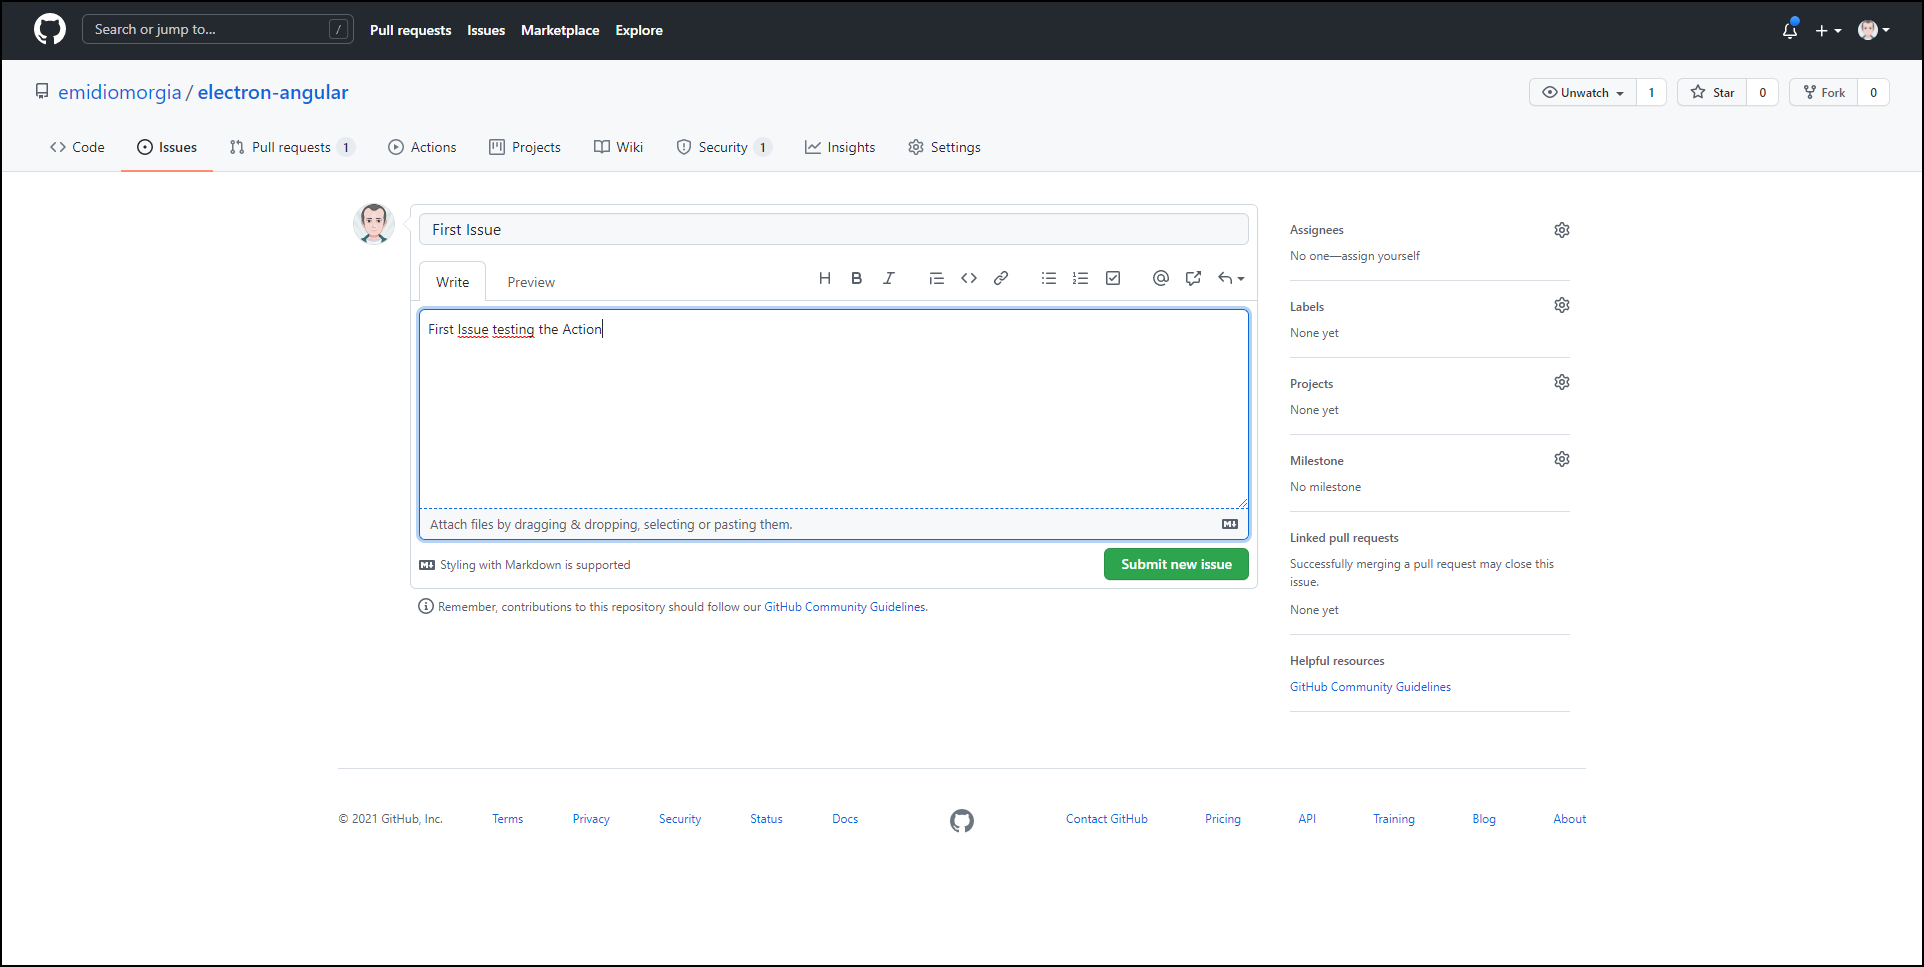
First issue creation
Once the issue has been saved, we can go back to the list of Actions to verify that it is executed.
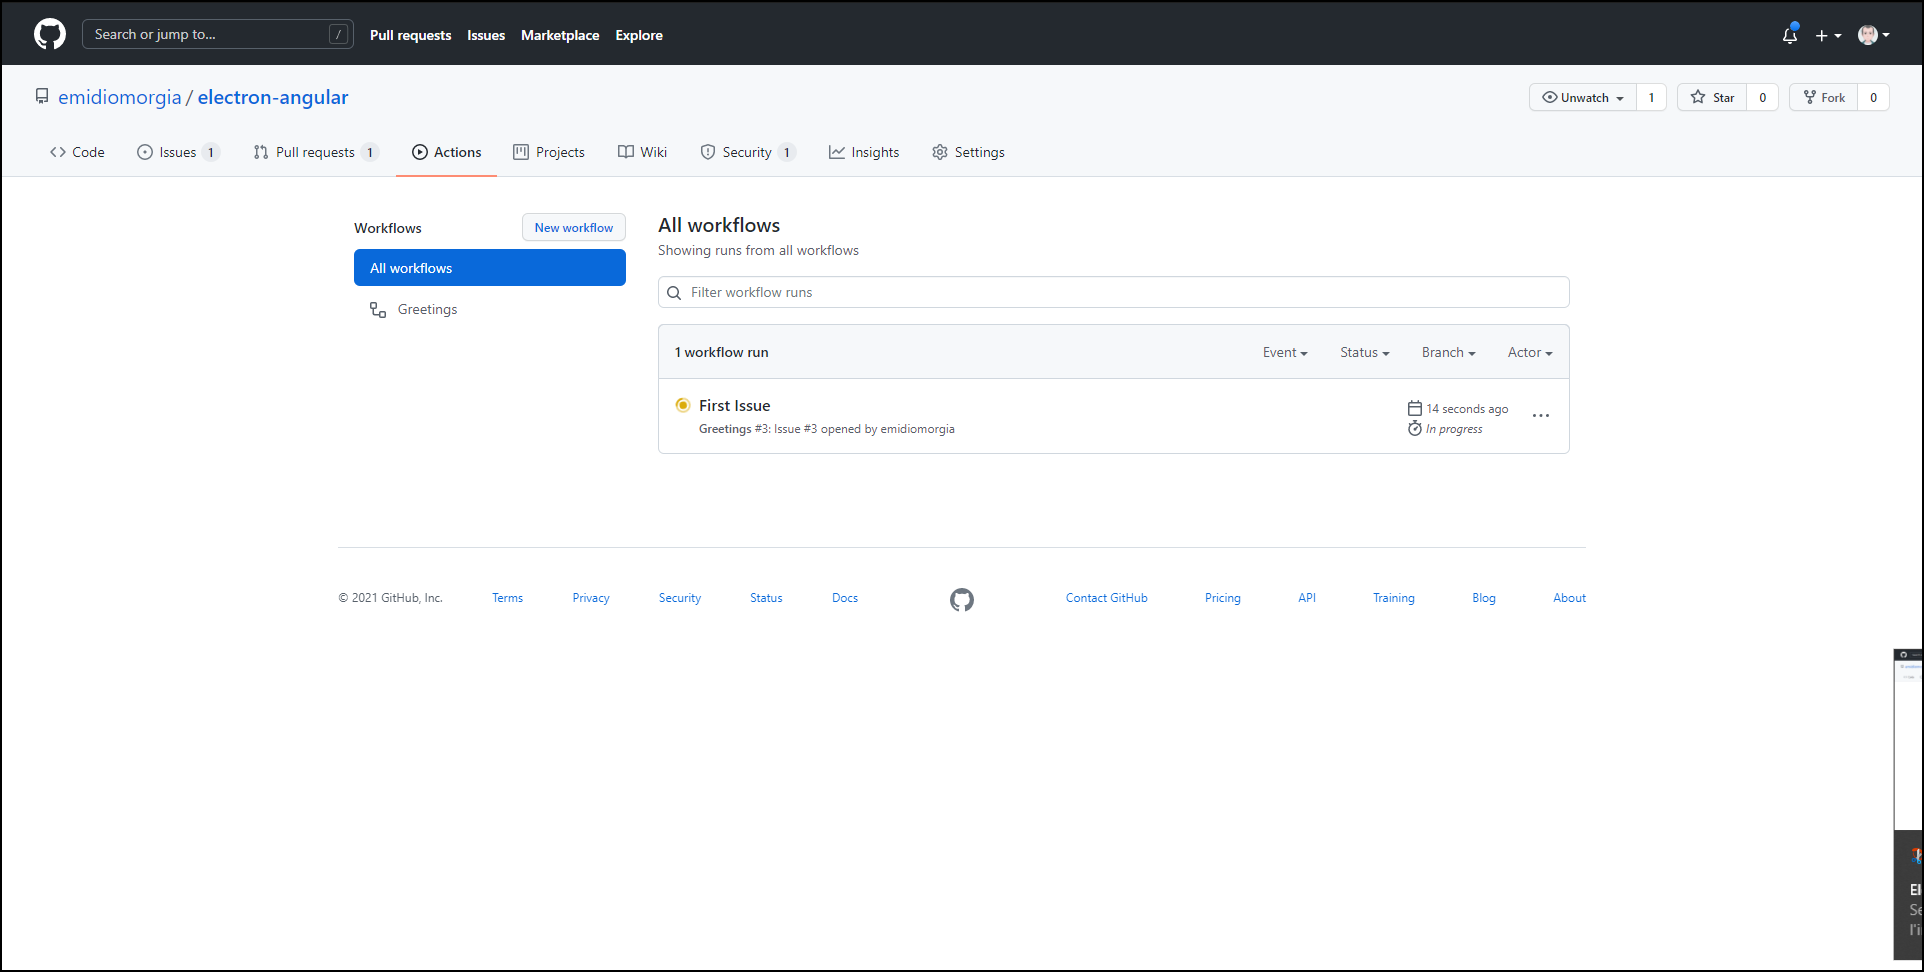
The Action is currently running
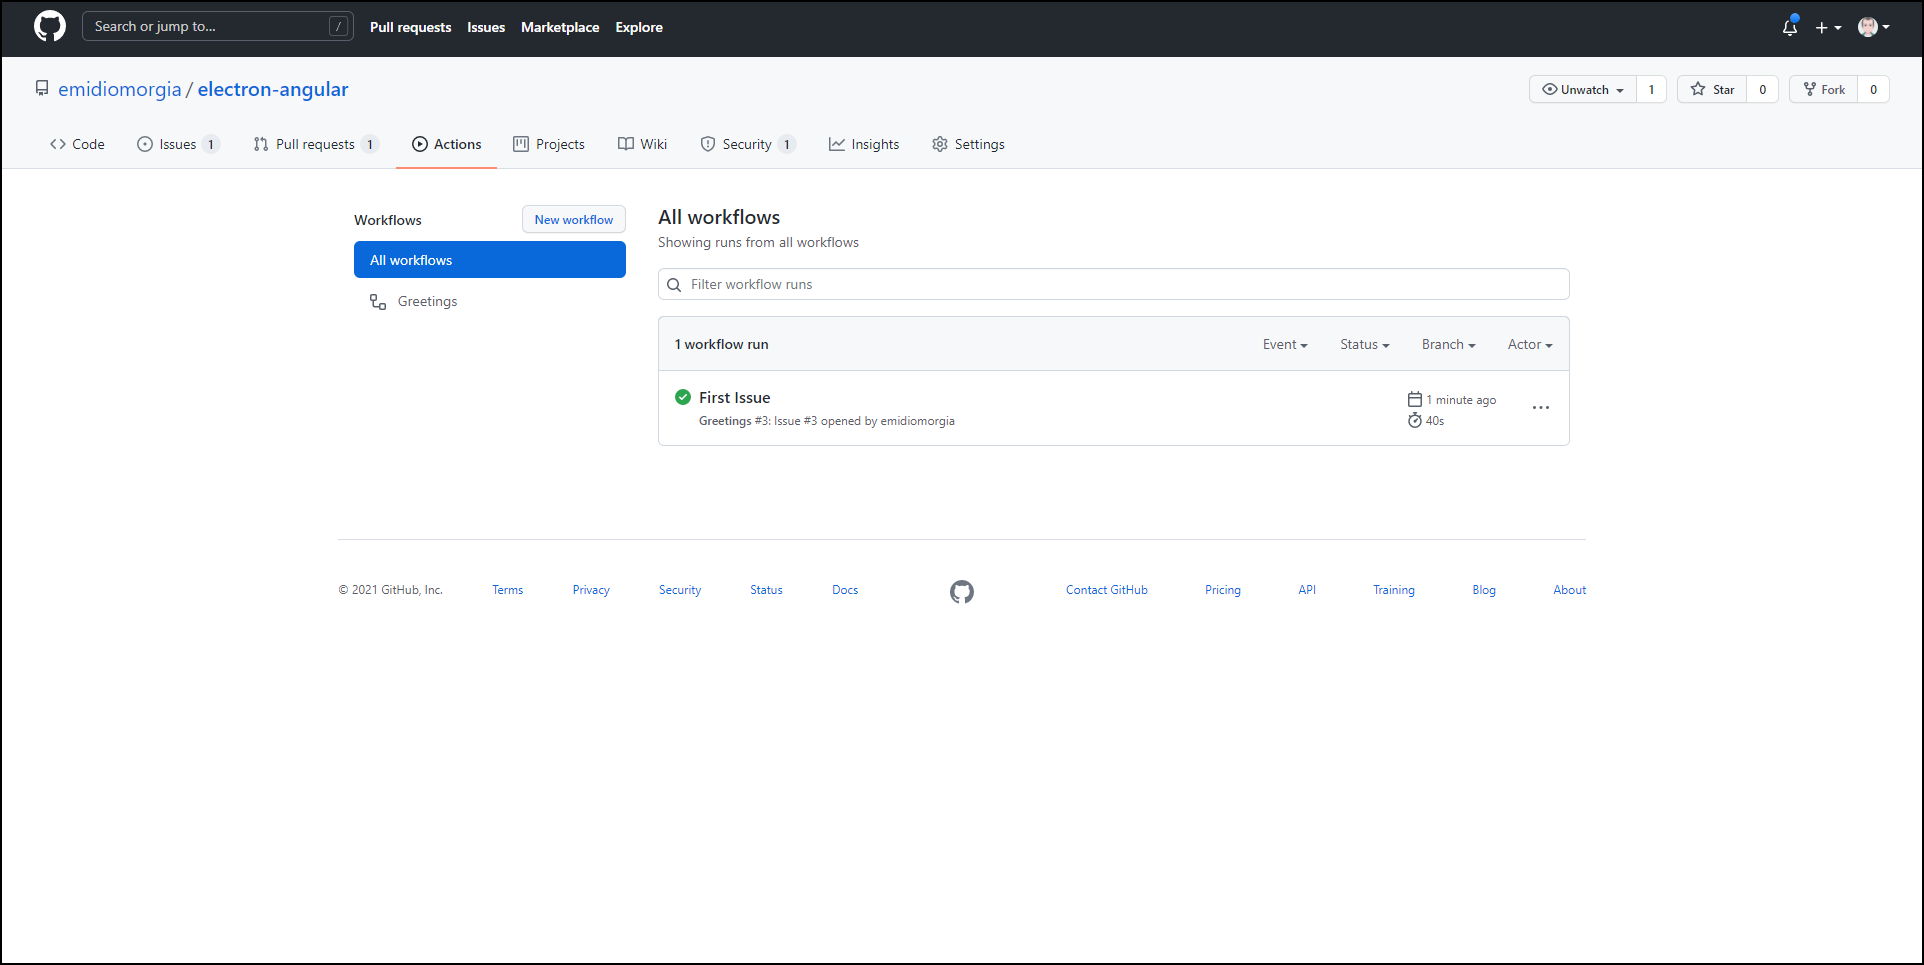
The Action is executed with success
Now if we click on the Action detail we can inspect the log.
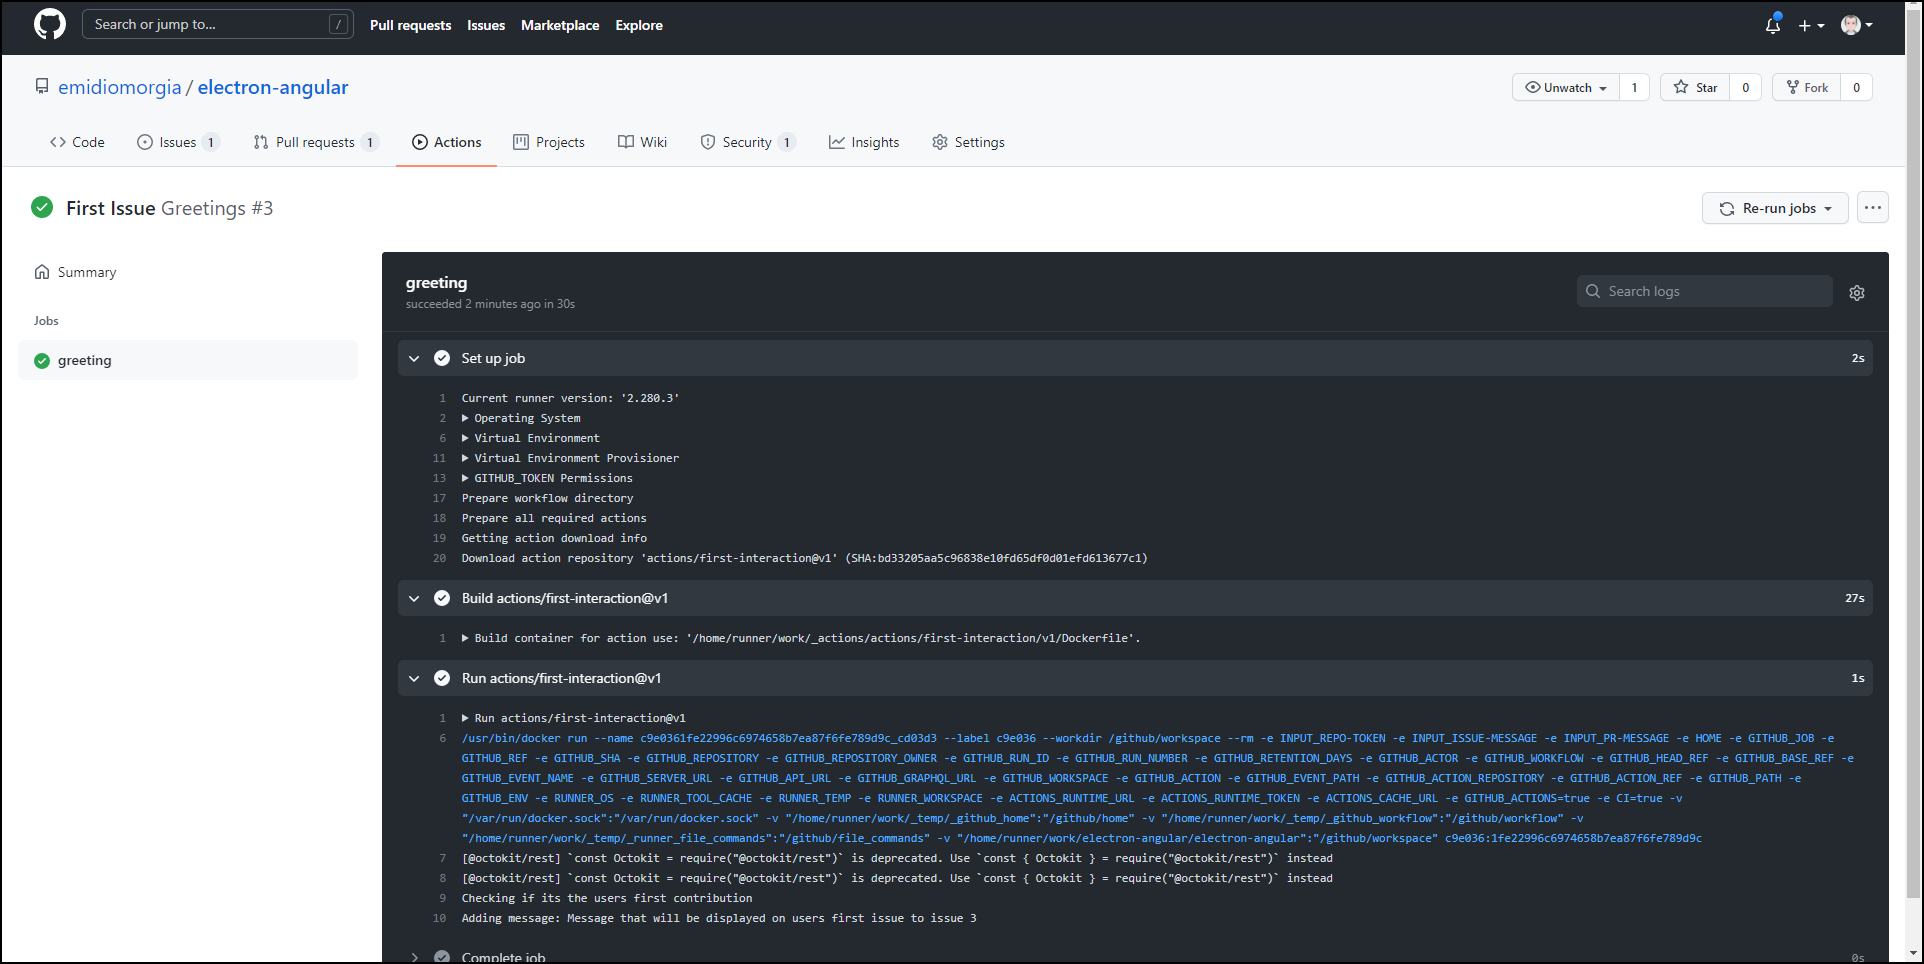
Action log after executed
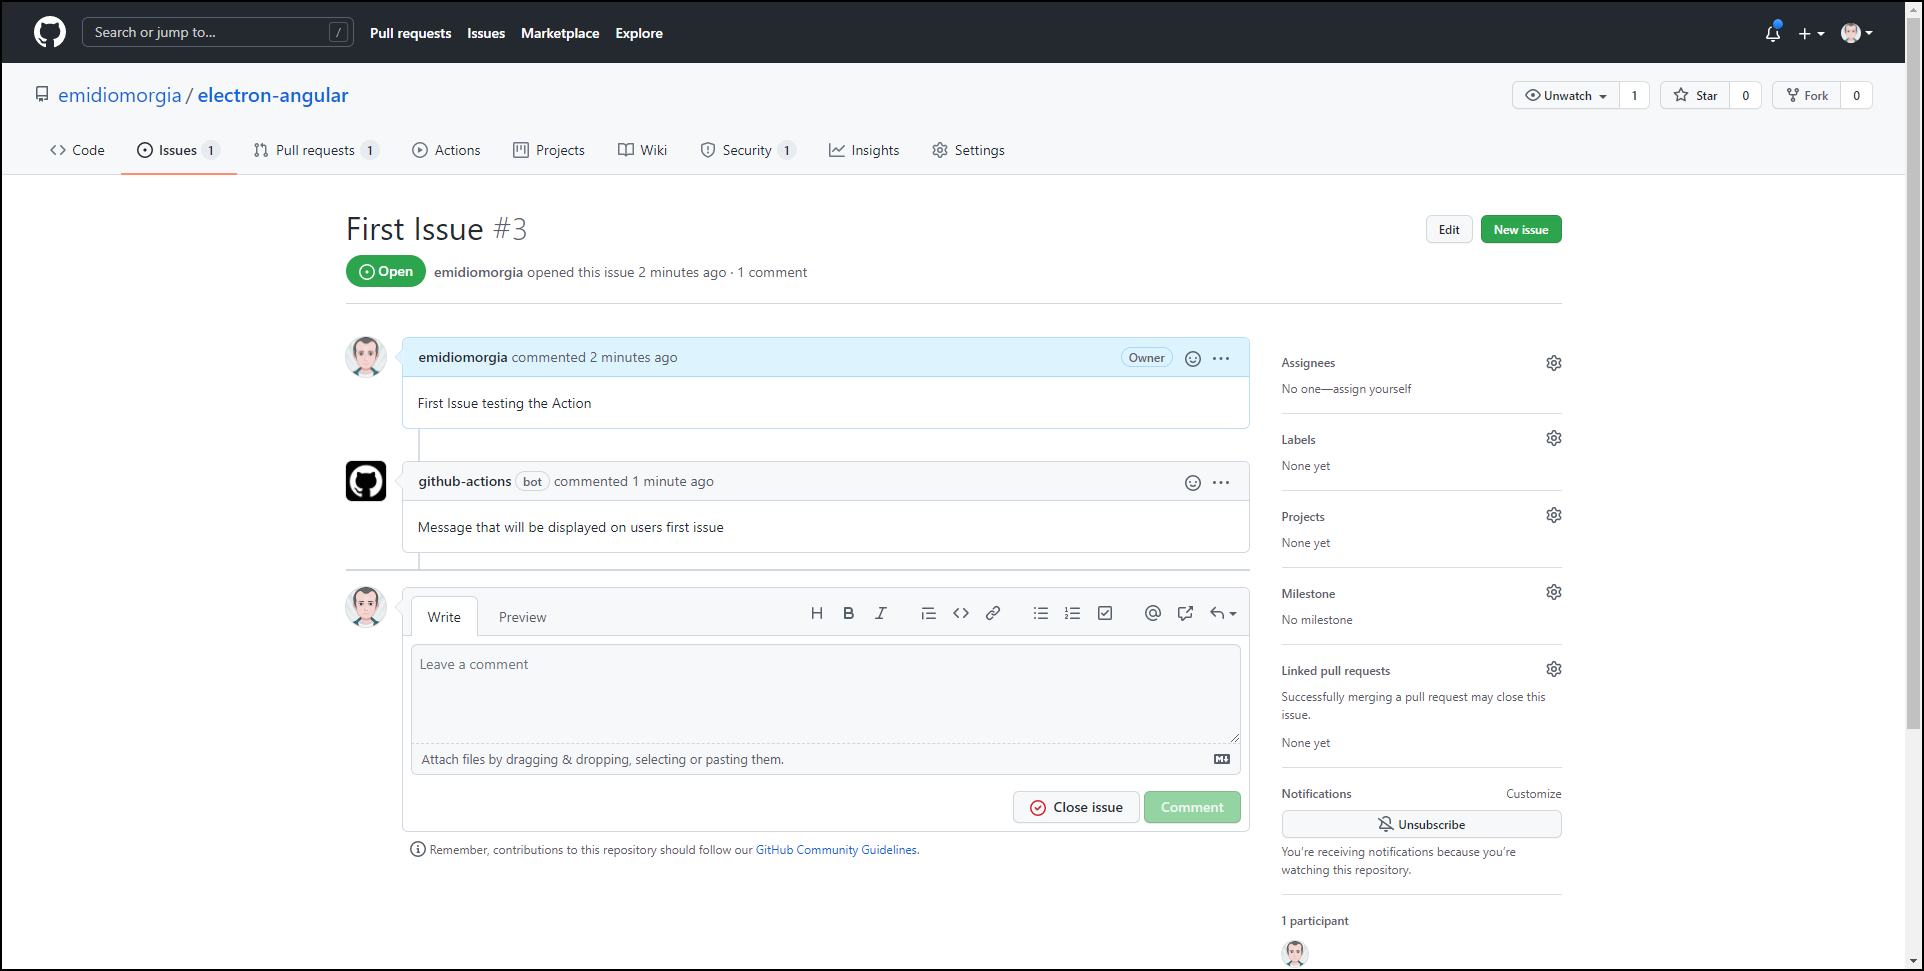
Let’s reopen the initial issue to see how it has been modified by our Action. We should find a welcome message following the text of our issue.
You can find the source of this example within this GitHub repository in the .github/workflows folder.
2.5 That’s all for now
In summary, we have seen what Continuous Integration and Continuos Delivery / Deploy are and what problems they want to solve. Below we have seen how it is possible to use GitHub Actions to automate workflows in response to events in our repository with a simple example.
Don’t miss the next post where we will talk about how to create an Action that compiles the source code of an Angular project and executes the automatic tests. We will also use another Action which, at the end of the Angular project build, will create a Docker image (containing NGINX and the static content of the project) and then publish the content on a Docker Hub repository.